Media Uploads in PixElement: Add Supplemental Project Files Directly to the Canvas
The Canvas is designed to bring more context into your mapping projects. With the new Media Uploads tool, users can now upload and organize supplemental files—including documents, spreadsheets, videos, and imagery—directly inside the Desktop and Cloud applications.
These uploads are not added as processing imagery and do not become part of the photogrammetry dataset. Instead, they serve as project-level reference files that can be placed, viewed, shared, and annotated directly on the Canvas. This gives teams a cleaner way to document site conditions, inspection notes, technical reports, and supporting media alongside the processed map or model.
What Are Media Uploads?
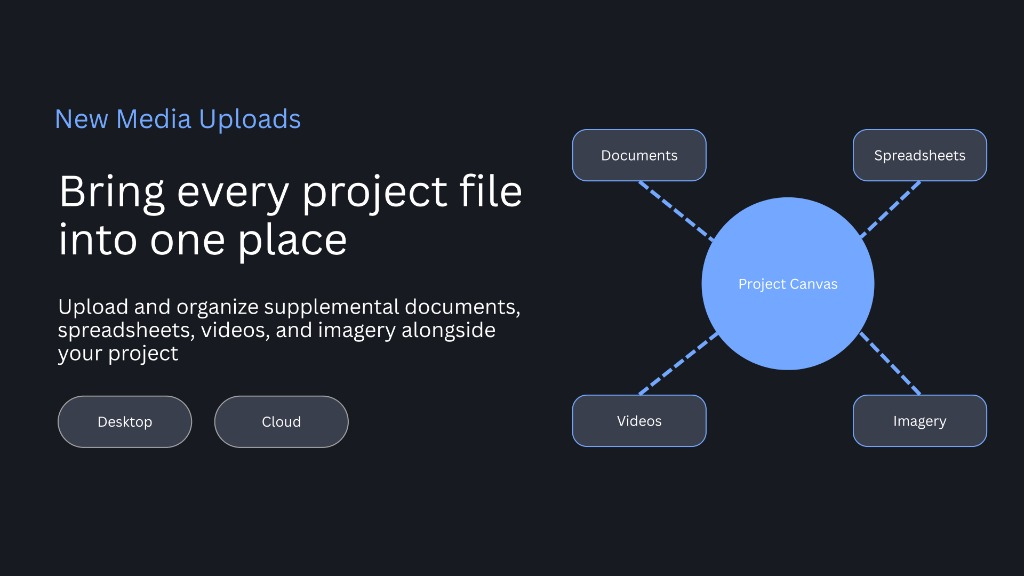
Media Uploads allow users to add any file to a project. These files can be positioned on the Canvas using location information from metadata or placed manually by the user.
This is especially useful when teams want to keep field reports, inspection logs, spreadsheets, site photos, or reference documentation connected to the correct project location without mixing those files into the original processing dataset.
For example, a project may include aerial imagery used to generate the orthomosaic or 3D model, while Media Uploads can be used to add separate PDF inspection reports, Excel stockpile calculations, field videos, or close-up ground photos that provide essential context for the site.
Adding Media: Set Location by Metadata or Manual Placement
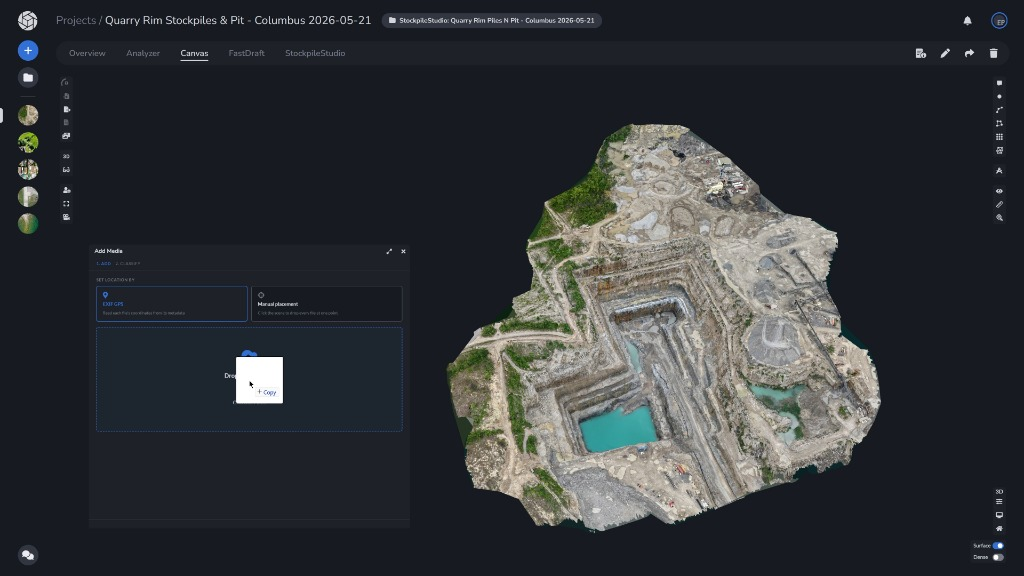
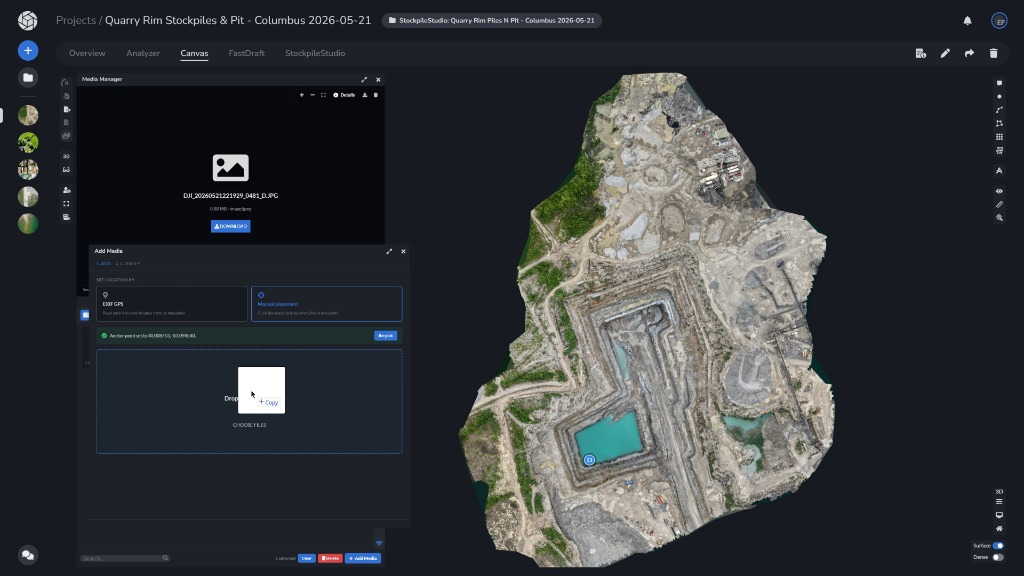
When adding media, users can choose how the uploaded files should be positioned on the Canvas.
- Metadata Coordinates: The first option is to read coordinate information from file metadata. This is useful for drone imagery, GPS-enabled field photos, or other geotagged files.
- Manual Placement: The second option is Manual Placement, which allows users to click directly on the scene to drop each file at a selected point. This is useful when the file does not contain location metadata or when the user wants to pin a document or image to a specific area of interest on the site.
Together, these options make Media Uploads flexible enough for both structured field capture and general project documentation. Users can drag and drop or browse to add their files.
Classify Media by Category
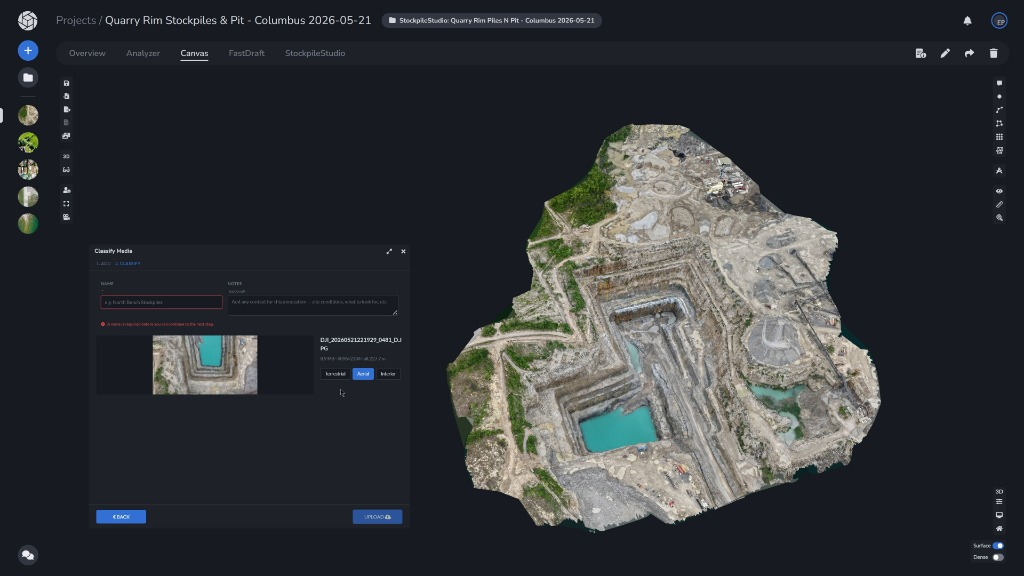
After uploading, users can give their file a name and notes, as well as classify it based on the type of content being added. These categories make it easier to organize different types of information within a project, especially when working with complex sites that include a mix of aerial, ground, and technical documentation. Current categories include:
| Category | Use Case |
|---|---|
| Terrestrial | Ground-level photos, field reports, and on-site inspection documents |
| Aerial | Drone imagery, overhead reference maps, and flight logs |
| Interior/Data | Indoor documentation, facility schematics, spreadsheets, and asset records |
Add Names and Notes for Better Project Context
Media Uploads support names and notes, allowing users to add context directly to each uploaded file.
A user can name a file based on its contents, such as “North Stockpile Report,” “Damaged Pavement Inspection,” “Facility Floor Plan,” or “Site Access Notes.” Notes can then be added to provide additional information, such as reviewer comments, site conditions, or instructions. This turns uploaded files into more than just a reference; they become a lightweight communication tool inside the project.
Review Locations
Lastly, you are asked to Review Locations, which allows you to edit the placement of the files on the canvas. Checkmark the file, select “Set Location via scene click,” and click on the canvas where you would like the file annotation to be placed. You are also able to edit the category of each file as needed.
View and Manage Uploaded Media in the Media Manager
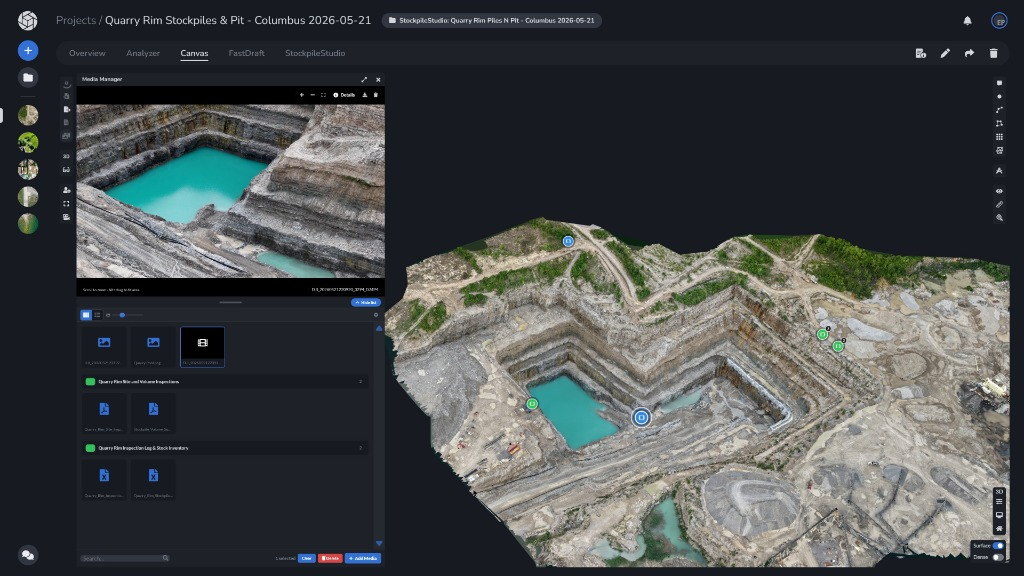
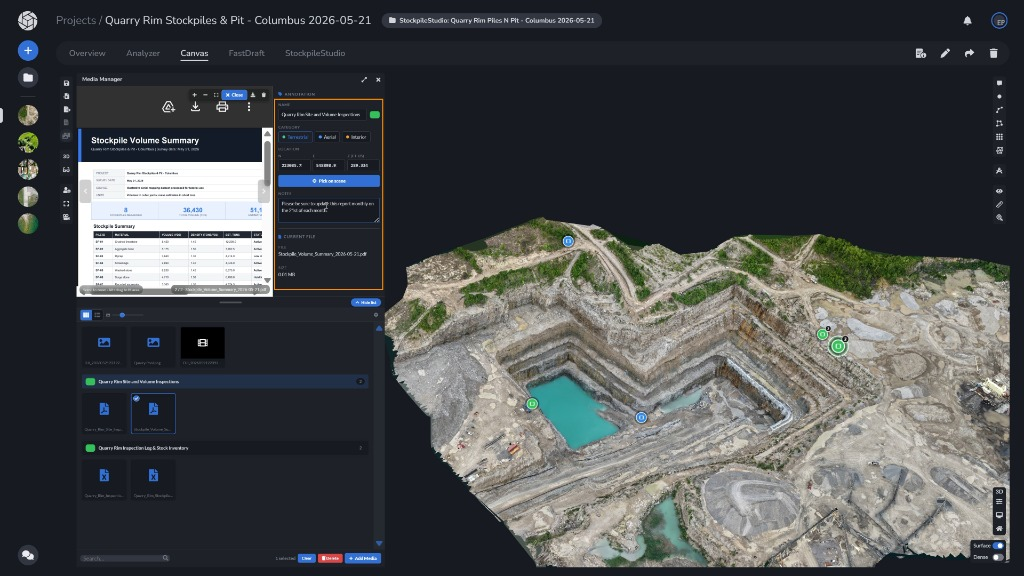
Upon saving, your uploaded files are organized in the Media Manager, where users can view, select, zoom, and manage project media. The panel provides a preview of each uploaded file and displays its annotation information, including name, category, location, and notes.
Users can also add more media at any time, clear selections, or delete files that are no longer needed.
Useful for Inspection, Review, and Collaboration
Media Uploads are especially valuable for projects where visual and technical context matters beyond the processed dataset. Common use cases include:
- Attaching ground-level inspection reports to an aerial mapping project
- Uploading spreadsheets of measurements or stockpile volumes
- Sharing site condition photos with clients or internal reviewers
- Documenting before-and-after project progress with various media formats
- Adding interior schematics or facility documentation
- Leaving notes for collaborators directly on uploaded project files
Because these files live with the project, they help reduce disconnected communication across email, folders, and external reports.
Cloud Storage and Data Usage
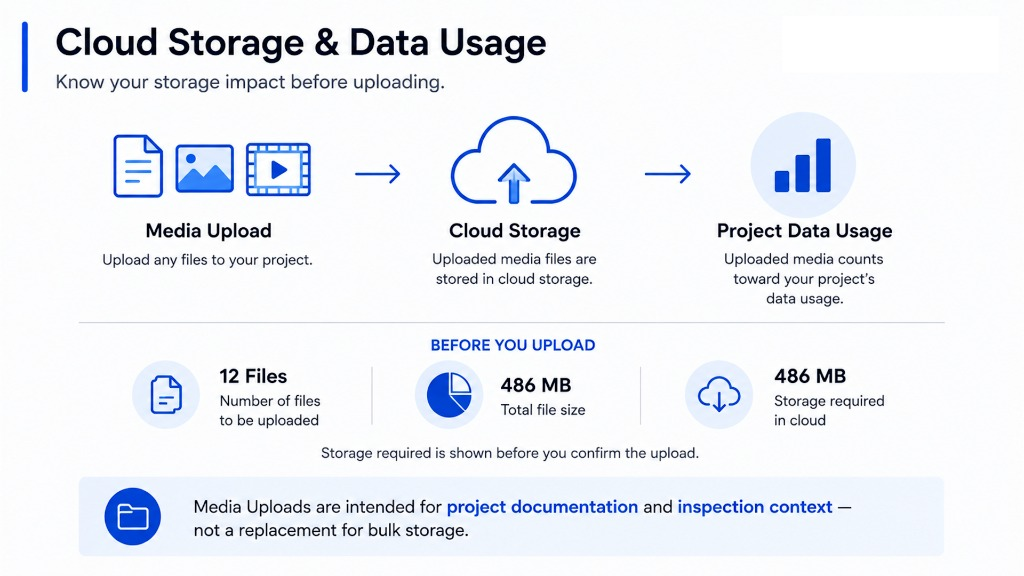
When using the Cloud, uploaded media files are stored in cloud storage and count against the project’s data usage. During upload, the file size, number of files, and the storage capacity required before the upload is confirmed are displayed.
This gives users visibility into how much storage will be used before files are uploaded. Media Uploads are intended for useful project documentation and inspection context, not as a replacement for bulk storage.
A More Complete Project Workspace
By allowing users to upload supplemental files, classify them, position them, and add notes, this makes it easier to communicate what is happening on a site without disrupting the original dataset.
Whether the media is a technical document, a ground-level image, or a video, this feature gives teams a practical way to connect project documentation to a centralized location where it matters most.